This section will go through the basic setting from the app to connect your Wordpress website
Install Wordpress library
The product is requisite to install the Wordpress site with support Dokan plugin, so any template that support Dokan will be work with the MStore Multi Vendor mobile app.
Once you have install the template, following free Wordpress plugins should be install (click the title Link below to download the package):
- Mstore API plugin: Extends the JSON API User for RESTful user registration, authentication, support all Payment Gateway, SMS Login and Facebook Logins.
- Better Rest API Featured Image: for some reason the image is not populate correctly so that need to install this plugin to support to show the image.
- WPML to WP API: support multi language from WPML plugin (require WPML installed if you would like to use multi language feature from the app)
-
Regenerate Thumbnails: allows you to regenerate all thumbnail sizes for one or more images that have been uploaded to your Media Library. This plugins is important to boost up your app performance and render the products image faster.
- Go to Settings → Media and config the size thumnail for the image, each image should have three size Small (300x300), Medium (600x600) and Large (1024x1024)
- Go to Tools → Generate Thumbnails: and click the button to generate the image.
-
JWT Authentication for REST API: This plugin is important to secure your Login account, this is new plugins require after version v1.2. To enable the plugins you need to update 2 things:
- Edit .haccess file and add follwing content:
RewriteEngine on RewriteCond %{HTTP:Authorization} ^(.*) RewriteRule ^(.*) - [E=HTTP_AUTHORIZATION:%1]- Edit wp-config.php file and add this code at bottom, your-top-secret-key the the random key:
define('JWT_AUTH_SECRET_KEY', 'your-top-secret-key');- The JWT needs a secret key to sign the token this secret key must be unique and never revealed.
-
Such as you must have add below code out of block
SetEnvIf Authorization "(.*)" HTTP_AUTHORIZATION=$1 -
or add this code for uploading Media When createing a new Post
<IfModule mod_headers.c> Header set Access-Control-Allow-Origin "*" </IfModule>
- Install the Dokan Pro or WC Vendor Plugins to support for the Multi Vendor features.
1. Install Demo App
Since version v1.2, the Mstore Multi Vendor is support for both Dokan and WC Vendor plugins so you can use with any templates that support to work with these plugins.
Some recommend templates:
- Electro Electronics Store WooCommerce Theme - our demo site dokan.mstore.com
- Rehub template - our demo site rehub.mstore.io
- Handy template - our demo site http://handy.mstore.io
And the according Expo app demo:
- Electro: https://shrtm.nu/yw4S
- Rehub: https://shrtm.nu/5VNi
- Handy: https://shrtm.nu/6Tso
The config for these demo is located at src/common/AppConfig_xxx.json file, to run these demo, you can copy the content and past to the src/common/AppConfig.json file
2. Permalink URL setting:
Go to Common Setting, change the URL to Post name, this is required for the setting otherwise some images could not loading.

Permalink URL setting
3. Membership registration:
Enable the option Anyone can register.
Membership registration
4. App config
Go the mstore project folder, open the file: src/common/AppConfig.js and follow 3 simple steps to setup the app.
- Step 1: change to your website URL and the wooCommerce API consumeKey

- Step 2: Setting Product Images
open the file: src/common/Config.js

- Step 3: Config image for the Payment Gateway
open the file: src/common/Config.js

5. Config Firebase & Chat
Step 1: Create Firebase App
- Go to https://console.firebase.google.com & click add project button (as image)

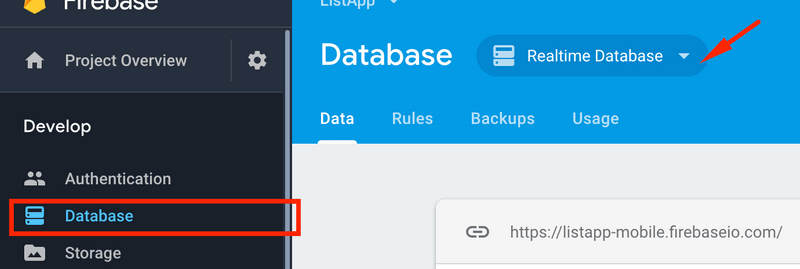
- Forward Database Tab, select Realtime Database (as image)
Step 2: Connect Firebase App To Your App
- Go to Config folder, move to your Config.js file
- Find a key with name general, you will see the key Firebase name fill in it
- apiKey : Go to Project Overview -> Project settings -> General tab

- authDomain : Go to Database Tab -> find as below image (get prefix .firebaseio.com) example : listapp.firebaseio.com => your authDomain is listapp.firebaseapp.com
- databaseURL : Go to Database Tab -> find as below image copy full URL paste into as below image
- storageBucket: yourFirebaseApp.appspot.com Example: your firebase app is listappMobile then storageBucket -> listappMobile.appspot.com
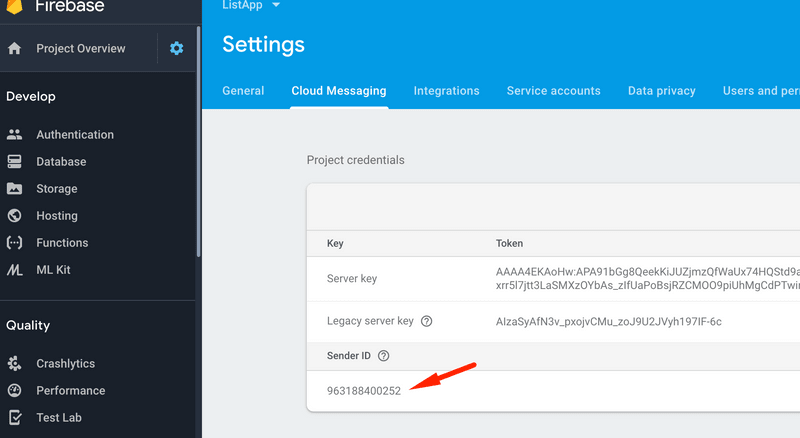
- messagingSenderId: Go to Project Overview -> Project settings -> Cloud Messaging tab

=> Done config for connect FireBase App such as your Chat. These steps are clarify from the config file, please follow the guide from these style for the customize config.


