This section is only used for FluxStore Pro product, please follow the steps below to build with the demo Opencart website and your own Opencart website (single vendor).
You can subscribe to the Youtube InspireUI Channel, like, and press the bell icon to get notifications for free instructional videos.
| REFERENCE LINKS: | |
|---|---|
| Opencart Open source 3.x | https://www.opencart.com |
| Demo website | http://opencart-demo.mstore.io |
| Medium Blog | https://medium.com/@inspireui |
| Youtube Channel | https://youtube.com/inspireui |
| Demo or more info | Fluxstore Pro |
1. Getting started
Please make sure you have finished the Getting Started guide before go to next section.
When installing, if you get issue, please go to Common Questions or Common Issues to find the solutions.
2. Test default demo website
After download and unzip the source code package, you works with the project source folder.
Test the Opencart demo: the demo is integrated with http://opencart-demo.mstore.io
- Override the content of
lib/example/opencart/config.jsonintolib/config/config_en.json - Override the content of
lib/example/opencart/config.dartintolib/common/config.dart
3. Integrate with your Opencart website
Step 1: Setup Opencart API
Install Mstore Api extension included in the source code package (as picture below). Open admin panel, then click Extensions->Installer and upload mstore.ocmod.zip
Video guide: you can subscribe to the Youtube InspireUI Channel, like, and press the bell icon to get notifications for free instructional videos.
⚠️ Note: If you are setting the site as local, make sure it is the local IP address or the virtual host, and it can be reached from the simulator.
Step 2: Setup Fluxstore
After configurating your website with above plugins, it's time to connect it with the Fluxstore app.
Open lib/common/config.dart and change the url from serverConfig section to your own website which has the API set:
const serverConfig = {
     "type": "opencart",
     "url": "http://opencart-demo.mstore.io"
 };
Open lib/config/config_en.json. Under the HorizonLayout is the setting to display the homepage layout, replace the category with your own category ID (this ID can get when editting from the category in admin site):
"HorizonLayout": [
    {
      "layout": "bannerImage",
      "isSlider": true,
      "items": [
        {
          "category": 21,
          "image": "https://user-images.githubusercontent.com/1459805/59846818-12672e80-938b-11e9-8184-5f7bfe66f1a2.png",
          "padding": 15.0
        },
        {
          "category": 23,
          "image": "https://user-images.githubusercontent.com/1459805/60091575-1f12ca80-976f-11e9-962c-bdccff60d143.png",
          "padding": 15.0
        },
    ...
]
Video guide to setup the Payment:
4. Config product options
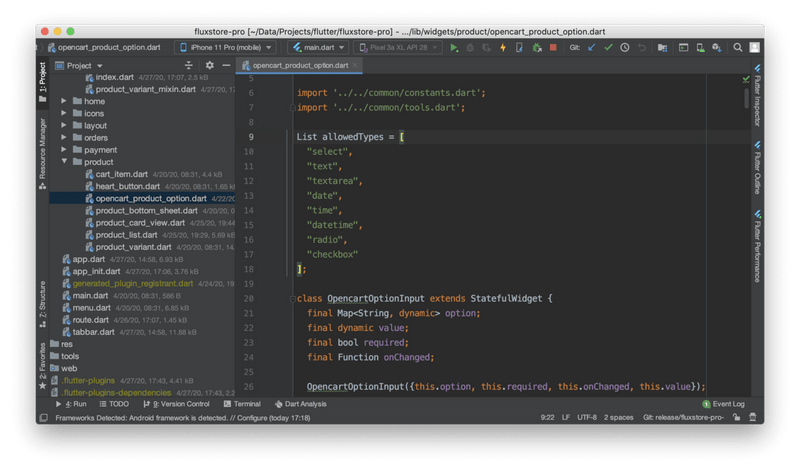
The app will work like magic to support the Product Options from Opencart. Those following types are supported at the current release.
Allowed Types support from Opencart:
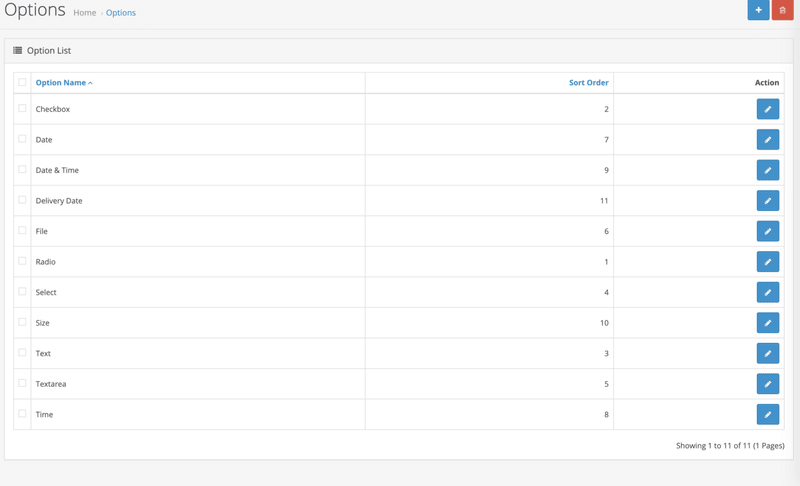
Opencart Admin Setting for Product Options:
5. Next step
After integrating with your website successfully, you can customize your app as below. If no need, just skip them and go to publish.
Design:
- Logo, splash screen, color, symbol, font, filter, settings screen...,
- Tabbar, banner slider, simple listview, blog,...
Features:
- Multi payment - native and webview payment;
- Multi language - RTL, add new language, default language;
- Sign In - google, apple, sms, facebook, email;
- Auto fill address from map;
- Setting for Ads - Admob and Facebook Ads;
- Push notifications
Publish to App store or Google play: change app icon, name, bundle ID, delivery.
- Others useful section - Improve performance, Development tips
- Get troubleshooting for the issue - Common Questions, Common Issues
- See more guide, go to the Install Checklist


